
Introduction to Shamanda Shower 3 Function Valve Replacement
Upgrading or repairing your shower often involves replacing essential components to ensure optimal performance and water efficiency. One common task homeowners face is replacing a shower valve, particularly a 3-function valve like the Shamanda Shower Valve. Whether you’re experiencing leaks, inconsistent water temperatures, or simply updating your bathroom fixtures, understanding the process of replacing a Shamanda Shower 3 function valve Replacement is crucial for a successful DIY project or for guiding your plumber.
In this article, we’ll explore what a Shamanda Shower 3 function valve Replacement is, why you might need to replace it, and a step-by-step guide to replacing it safely and effectively. We’ll also cover tips for troubleshooting common issues and maintaining your new valve for longevity.
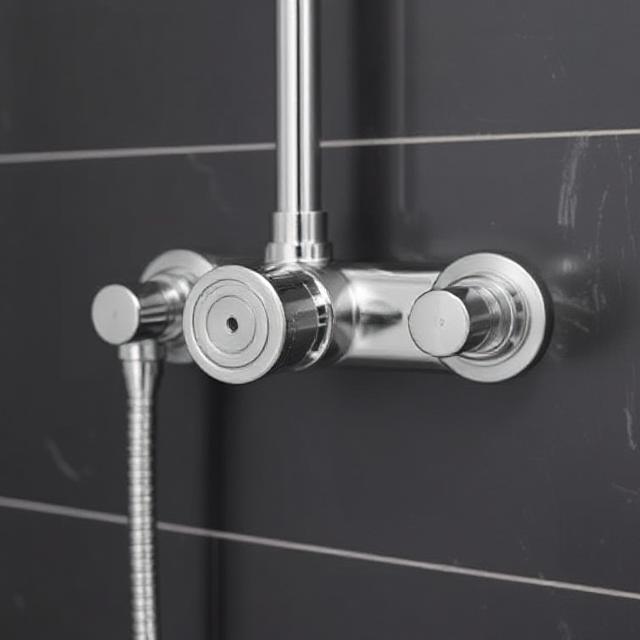
What Is a Shamanda Shower 3 Function Valve Replacement?
A 3-function shower valve allows you to control three different water outputs or functions—commonly the showerhead, hand shower, and tub spout—using a single valve mechanism. This setup provides versatility, enabling users to switch between different water outlets or run multiple simultaneously.
The Shamanda Shower 3 Function Valve Replacement brand offers reliable, multi-functional valves designed for durability and ease of operation. Their 3-function valves typically feature a single handle or multiple controls that regulate water flow and temperature, integrating seamlessly into modern shower systems.
Reasons for Replacing Your Shamanda Shower 3 Function Valve Replacement
There are several reasons you might need to replace your Shamanda Shower 3 Function Valve Replacement:
- Leaks or Dripping: Over time, internal components can wear out, leading to leaks that waste water and increase utility bills.
- Temperature Fluctuations: Inconsistent water temperature or difficulty maintaining a steady temperature signals that the valve’s cartridge or internal parts may be failing.
- Reduced Water Pressure: Blockages or worn-out parts can cause decreased water flow, affecting shower comfort.
- Upgrading or Renovation: Installing a new shower system or modern fixtures might require replacing the existing valve.
- Corrosion or Damage: Exposure to hard water or mineral buildup can corrode internal parts, necessitating replacement.
Tools and Materials Needed
Before beginning the replacement process, gather the necessary tools and materials:
- Shamanda Shower 3 Function Valve Replacement (make sure it’s compatible with your existing setup)
- Adjustable wrench
- Screwdrivers (flat-head and Phillips)
- Allen wrenches (hex keys)
- Plumbing tape (Teflon tape)
- Plumber’s putty or silicone sealant
- Bucket or towel (to catch water)
- Safety gloves and eye protection
Step-by-Step Guide to Replacing the Shamanda Shower 3 Function Valve Replacement
1. Turn Off Water Supply
Safety first. Locate your home’s main water shut-off valve and turn off the water supply to the shower. Open the existing shower valve to drain any remaining water and relieve pressure.
2. Remove the Shower Handle and Trim Plate
Using a screwdriver or Allen wrench, carefully remove the handle and trim plate covering the valve. Keep screws and small parts in a safe place for reinstallation.
- Note: Some models may have decorative caps covering screws; gently pry these off before unscrewing.
3. Identify and Remove the Old Valve
Once the trim and handle are removed, locate the valve body inside the wall. Depending on your setup, you may need to:
- Unscrew or unbolt the valve from the plumbing connections.
- Use an adjustable wrench to disconnect water lines.
If the valve is soldered or glued, you may need to cut or carefully detach it, which can be more complex and might require professional assistance.
4. Prepare the New Valve
Before installing the new Shamanda Shower 3 Function Valve Replacement:
- Inspect it for defects.
- Wrap threaded connections with plumbing tape to prevent leaks.
- Verify compatibility with your existing plumbing setup.
5. Install the New Valve
Position the new valve inside the wall cavity:
- Connect water lines or fittings, tightening securely with an adjustable wrench.
- Ensure the valve is oriented correctly to match your shower’s configuration.
- If your model includes a cartridge or specific internal components, install them according to the manufacturer’s instructions.
6. Reassemble the Trim and Handle
Once the valve is securely in place:
- Replace the trim plate.
- Reattach the handle, ensuring it operates smoothly.
- Check for proper alignment and movement.
7. Turn On Water and Test
Slowly turn the main water supply back on. Open the shower valve to check for:
- Leaks around connections.
- Proper water flow from all functions.
- Correct temperature regulation.
Make adjustments as needed, tightening connections or repositioning components.
8. Final Checks and Sealing
Apply silicone sealant around the trim plate if necessary to prevent water ingress behind the wall. Wipe away excess sealant.
Troubleshooting Common Issues
- Leaks After Replacement: Check all connections for tightness and reapply plumbing tape if necessary. Inspect the cartridge for proper seating.
- Inconsistent Temperature: Ensure the cartridge is correctly installed and functioning. Replacing the cartridge may be necessary if it’s worn out.
- Low Water Pressure: Confirm that the supply lines are open and free of obstructions. Clean or replace any clogged aerators or filters.
Maintenance Tips for Longevity
- Regularly clean the showerhead and outlets to prevent mineral buildup.
- Periodically check for leaks or drips and address them promptly.
- Use water softeners if you have hard water to reduce corrosion and mineral deposits.
- Replace internal components like cartridges as recommended by the manufacturer.
Conclusion
Replacing a Shamanda Shower 3 function valve Replacement is a manageable task that can significantly improve your shower experience. By following the proper steps—turning off water, removing old components, installing the new valve, and testing thoroughly—you can ensure a reliable, leak-free upgrade. Always refer to the specific manufacturer’s instructions for your model, and don’t hesitate to seek professional help if you’re unsure about any step.
With proper maintenance and timely replacements, your shower system will continue to deliver comfort and efficiency for years to come.